Home renovations are exciting. New rooms, fresh layouts, updated kitchens and bathrooms, and a house that finally works the way you want it to. But there’s one thing that gets overlooked on almost every renovation project in Nambour, and it causes months of frustration long after the tradies have packed up and left. WiFi mistakes made during the building phase are responsible for some of the most persistent and expensive network problems we see at Brocky’s Internet.
The frustrating part? Every single one of them is avoidable. With a little planning before the walls go up and the cabling gets buried, you can have a home network that performs reliably in every room, for every device, from the day you move back in.
At Brocky’s Internet, we work with homeowners and renovators across Nambour and the Sunshine Coast to get their networks right from the start. Here are the most common WiFi mistakes we see during home renovations, and exactly how to avoid them.
The Most Common WiFi Mistakes During Home Renovations
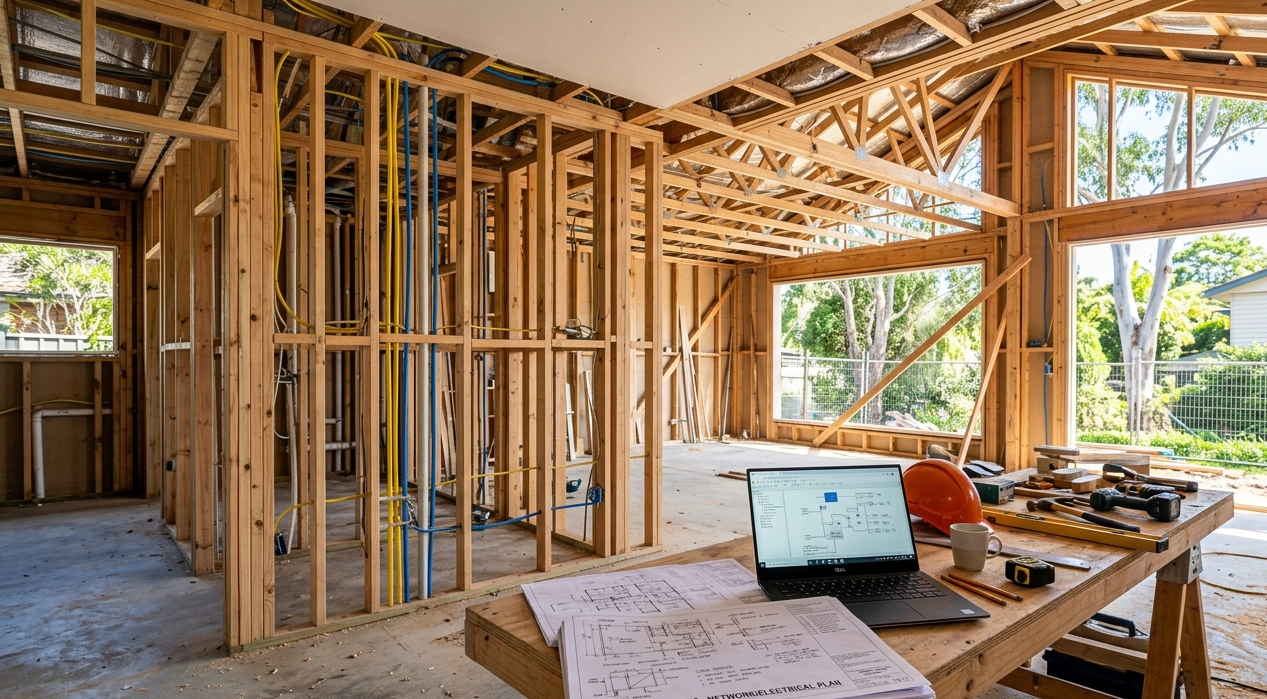
1. Not Planning the Network Before the Walls Go Up
This is the single most costly WiFi mistake made during renovations, and it’s also the most common. Most homeowners focus on the visible elements, flooring, cabinetry, lighting, and leave the network as an afterthought. By the time they think about Wi-Fi, the walls are already plastered and the cabling access points are gone.
What to do instead:
- Plan your network layout before any internal walls are closed
- Identify where you’ll need wired Ethernet drops, TV wall points, and access point mounting locations
- Discuss your network plan with your electrician and builder before work begins
- Mark cable run pathways on your renovation plans so they’re not missed during the build
A network planned at the design stage costs a fraction of what it costs to retrofit after completion.
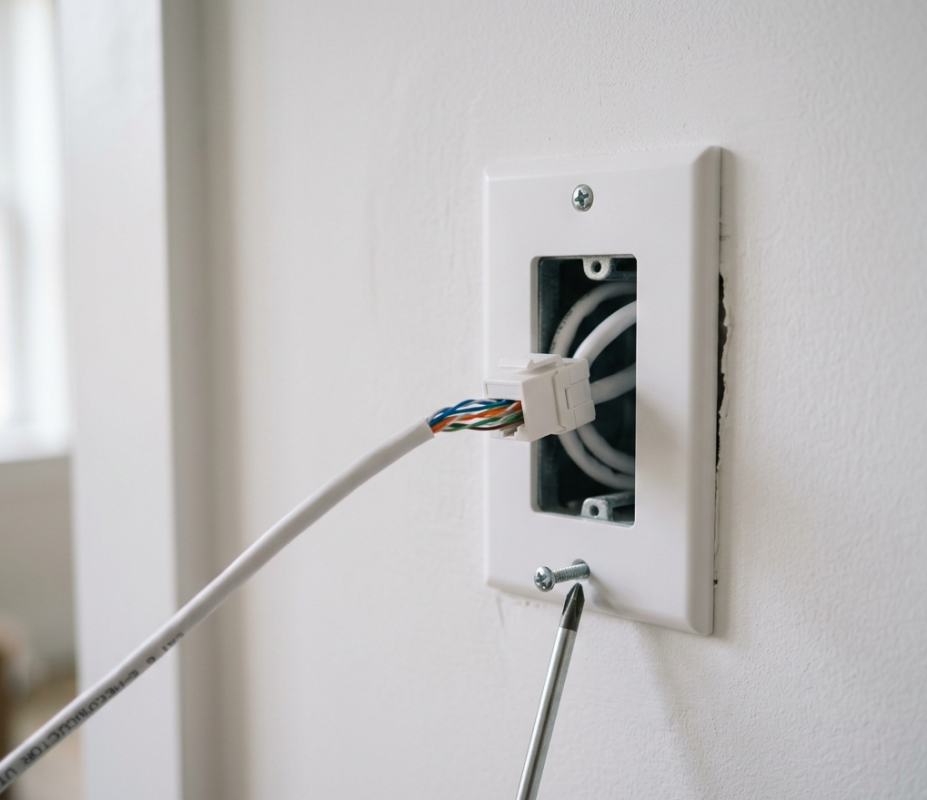
2. Relying Entirely on Wi-Fi and Skipping Ethernet Cabling
One of the biggest WiFi mistakes renovators make is assuming that wireless coverage alone will be sufficient for a modern household. Wi-Fi is convenient, but a wired Ethernet backbone is what separates a genuinely reliable home network from one that struggles under load.
What to do instead:
- Install Cat6 or Cat6A Ethernet cabling to key locations during the renovation, including the living room, home office, and any rooms where smart TVs or gaming consoles will be used
- Run cabling to the location where your access points will be mounted for wired backhaul
- Include at least one Ethernet drop in every bedroom for future-proofing
The cost of running cabling during a renovation is minimal compared to the cost and disruption of retrofitting it later.
3. Placing the Router or Access Points in the Wrong Location
Even with great hardware, poor placement is one of the most common WiFi mistakes that kills network performance. A router tucked inside a cabinet, positioned at one end of a long home, or placed on the floor behind furniture will underperform regardless of how much it cost.
What to do instead:
- Plan access point locations at central, elevated positions throughout the home
- Avoid placing networking equipment inside enclosed cabinetry or near other electronics that cause interference
- In larger Nambour homes or multi-storey renovations, plan for multiple access points rather than relying on a single router to cover the entire property
- Consider ceiling-mounted access points in high-traffic areas for maximum coverage and aesthetics
4. Choosing the Wrong Hardware for the Home’s Size and Layout
Buying a router off the shelf without considering your home’s specific layout, size, and device load is a WiFi mistake that leads to coverage gaps, slow speeds, and constant troubleshooting.
What to look for:
- Wi-Fi 6 or Wi-Fi 6E capable hardware for modern device-heavy homes
- A mesh Wi-Fi system for larger renovations, open floor plans, or properties with outbuildings
- Tri-band systems for homes with high simultaneous device usage
- Hardware that supports wired backhaul between nodes for the best mesh performance
As explained on Wikipedia’s Wi-Fi page, different Wi-Fi standards deliver vastly different performance outcomes depending on the environment, making hardware selection a critical decision rather than an afterthought.
5. Not Accounting for Building Materials That Block Wi-Fi
Renovation materials have a significant impact on wireless signal penetration, and ignoring this is one of the most overlooked WiFi mistakes on Sunshine Coast renovations. Concrete, brick, double-glazed windows, metal framing, and insulated wall panels all attenuate Wi-Fi signals to varying degrees.
What to do instead:
- Map the materials being used in walls, floors, and ceilings before finalising your network plan
- In areas with dense building materials, plan for wired Ethernet access points rather than relying on wireless signal penetration
- Discuss signal penetration challenges with your network installer before work begins
Our guide on improving Wi-Fi coverage in multi-storey homes covers exactly how building materials affect signal and what to do about it, well worth reading if your renovation spans more than one level.
6. Forgetting to Plan for Outdoor Areas
Alfresco entertaining areas, pool decks, backyard offices, and sheds are an afterthought on most renovation network plans, and one of the WiFi mistakes we fix most often after the fact.
What to do instead:
- Identify any outdoor areas where Wi-Fi connectivity will be needed during the planning phase
- Run conduit or cabling to outdoor access point locations before landscaping and paving is completed
- Use outdoor-rated access points designed for Australian weather conditions
- Plan a separate outdoor network segment to protect your main household network
7. Not Using a Professional for the Network Design and Installation
The most avoidable of all WiFi mistakes is attempting to design and install a whole-home network without professional input. Consumer-grade routers with default settings, self-installed access points with no site survey, and cabling run without proper planning consistently produce networks that underperform from day one.
According to NBN Co’s home network guide, proper internal network setup is one of the most important factors in realising the full performance of an NBN connection, and it requires planning that goes well beyond plugging in a router.
For Nambour homeowners, our WiFi installation and repair service in Nambour is designed specifically to get your network right during or after a renovation. And if your project spans across to Maroochydore, our WiFi installation and repair service in Maroochydore covers that side of the Coast too.
When to Stop Planning Yourself and Call a Professional
These are clear signs your renovation network needs professional input rather than a DIY approach:
- Your renovation covers more than one storey or a large floor plan
- You’re using concrete, brick, or metal-framed construction
- Your renovation includes an outbuilding, granny flat, or outdoor entertaining area
- You’re planning a smart home setup with multiple connected devices
- You’ve had poor Wi-Fi in a previous home and want to get it right this time
- Your builder or electrician hasn’t discussed network cabling with you
Getting professional advice during the planning phase costs far less than fixing WiFi mistakes after the renovation is complete.
Why Nambour Locals Trust Brocky’s Internet
We’re a local service, not a call centre. When you contact Brocky’s Internet, an experienced local technician talks to you directly, reviews your renovation plans, and gives you clear, honest advice about what your network actually needs before a single wall goes up.
Here’s what you get with every service at Brocky’s Internet:
- Experienced local technicians across all major router and mesh system brands
- Honest advice, we’ll tell you if your existing hardware just needs reconfiguring
- Fast response times across Nambour and the wider Sunshine Coast
- Transparent, upfront pricing with no hidden costs
- A personal walkthrough so you understand your own network
We’ll let the locals we’ve helped do the talking.
Get Your Renovation Network Right From Day One
Don’t let WiFi mistakes during your renovation leave you troubleshooting for months after moving back in. Whether it’s a network design consultation, full cabling installation, or a professional Wi-Fi setup, the team at Brocky’s Internet is ready to help.
From avoiding costly WiFi mistakes to full home network installation across Nambour and the Sunshine Coast, you can find everything we do at Brocky’s Internet.
Contact Brocky’s Internet today and we’ll make sure your renovation network performs the way your new home deserves.
FAQs
1. When should I plan my home network during a renovation?
Before the walls go up. Network cabling should be planned and installed during the framing stage, before internal walls are closed. Retrofitting cabling after completion is significantly more expensive and disruptive.
2. Do I need Ethernet cabling if I have good Wi-Fi?
Yes. A wired Ethernet backbone significantly improves reliability and performance, especially for smart TVs, gaming consoles, and home offices. Wi-Fi alone is rarely sufficient for a modern household’s full device load.
3. How many access points do I need for my renovation?
It depends on your home’s size, layout, and building materials. A professional site assessment during the planning phase will give you a clear answer specific to your property.
4. Can building materials really affect my Wi-Fi signal?
Yes, significantly. Concrete, brick, metal framing, and double-glazed windows all reduce Wi-Fi signal strength. Planning your network around your building materials prevents dead zones before they happen.
5. Does Brocky’s Internet offer network planning for renovations in Nambour?
Yes. We provide network design consultations, cabling installation, and full Wi-Fi setup for home renovations across Nambour and the Sunshine Coast.


One thought on “Common WiFi Mistakes During Home Renovations in Nambour”
Comments are closed.